This guide goes over everything you need to know about the iOS 18 Passwords app.
Layout
The Passwords app is installed automatically when upgrading to iOS 18, iPadOS 18, or macOS Sequoia. The app has a simple layout with a search bar right at the top, so you can look up the information that you’re looking for.
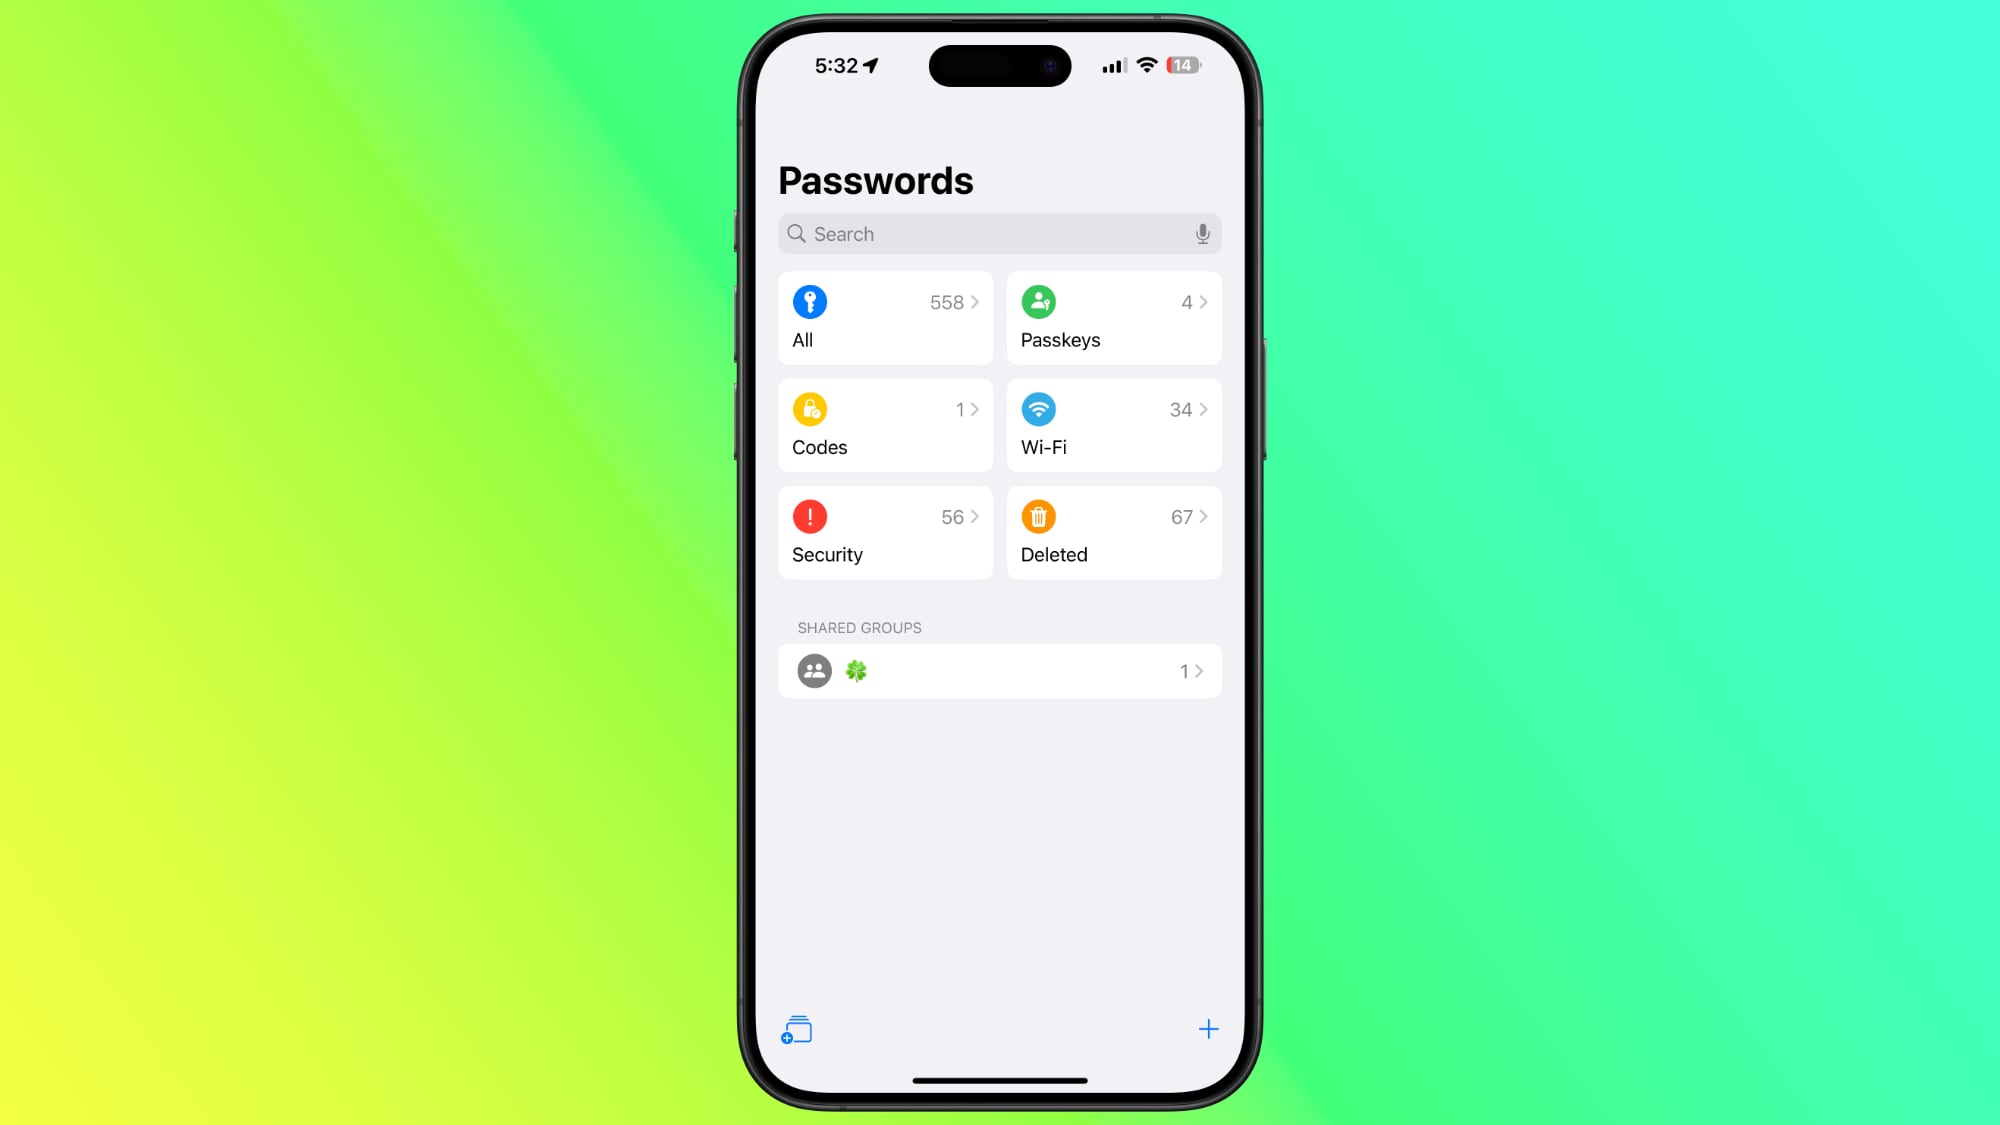
If you’ve already used the iCloud Keychain feature, all of your saved logins and passwords will be ready to go as soon as you authenticate with Face ID or Touch ID. There are separate sections for passwords and logins (under All), Passkeys, two-factor authentication codes, Wi-Fi passwords, security warnings, and logins that have been deleted.

You can tap in to any of the sections to see what’s listed there, and tapping on an individual entry shows the login and password. Each entry has fields for site or app name, username, login, verification code, websites where the login is used, and notes. There’s also a one-tap option for changing your password for any given entry.
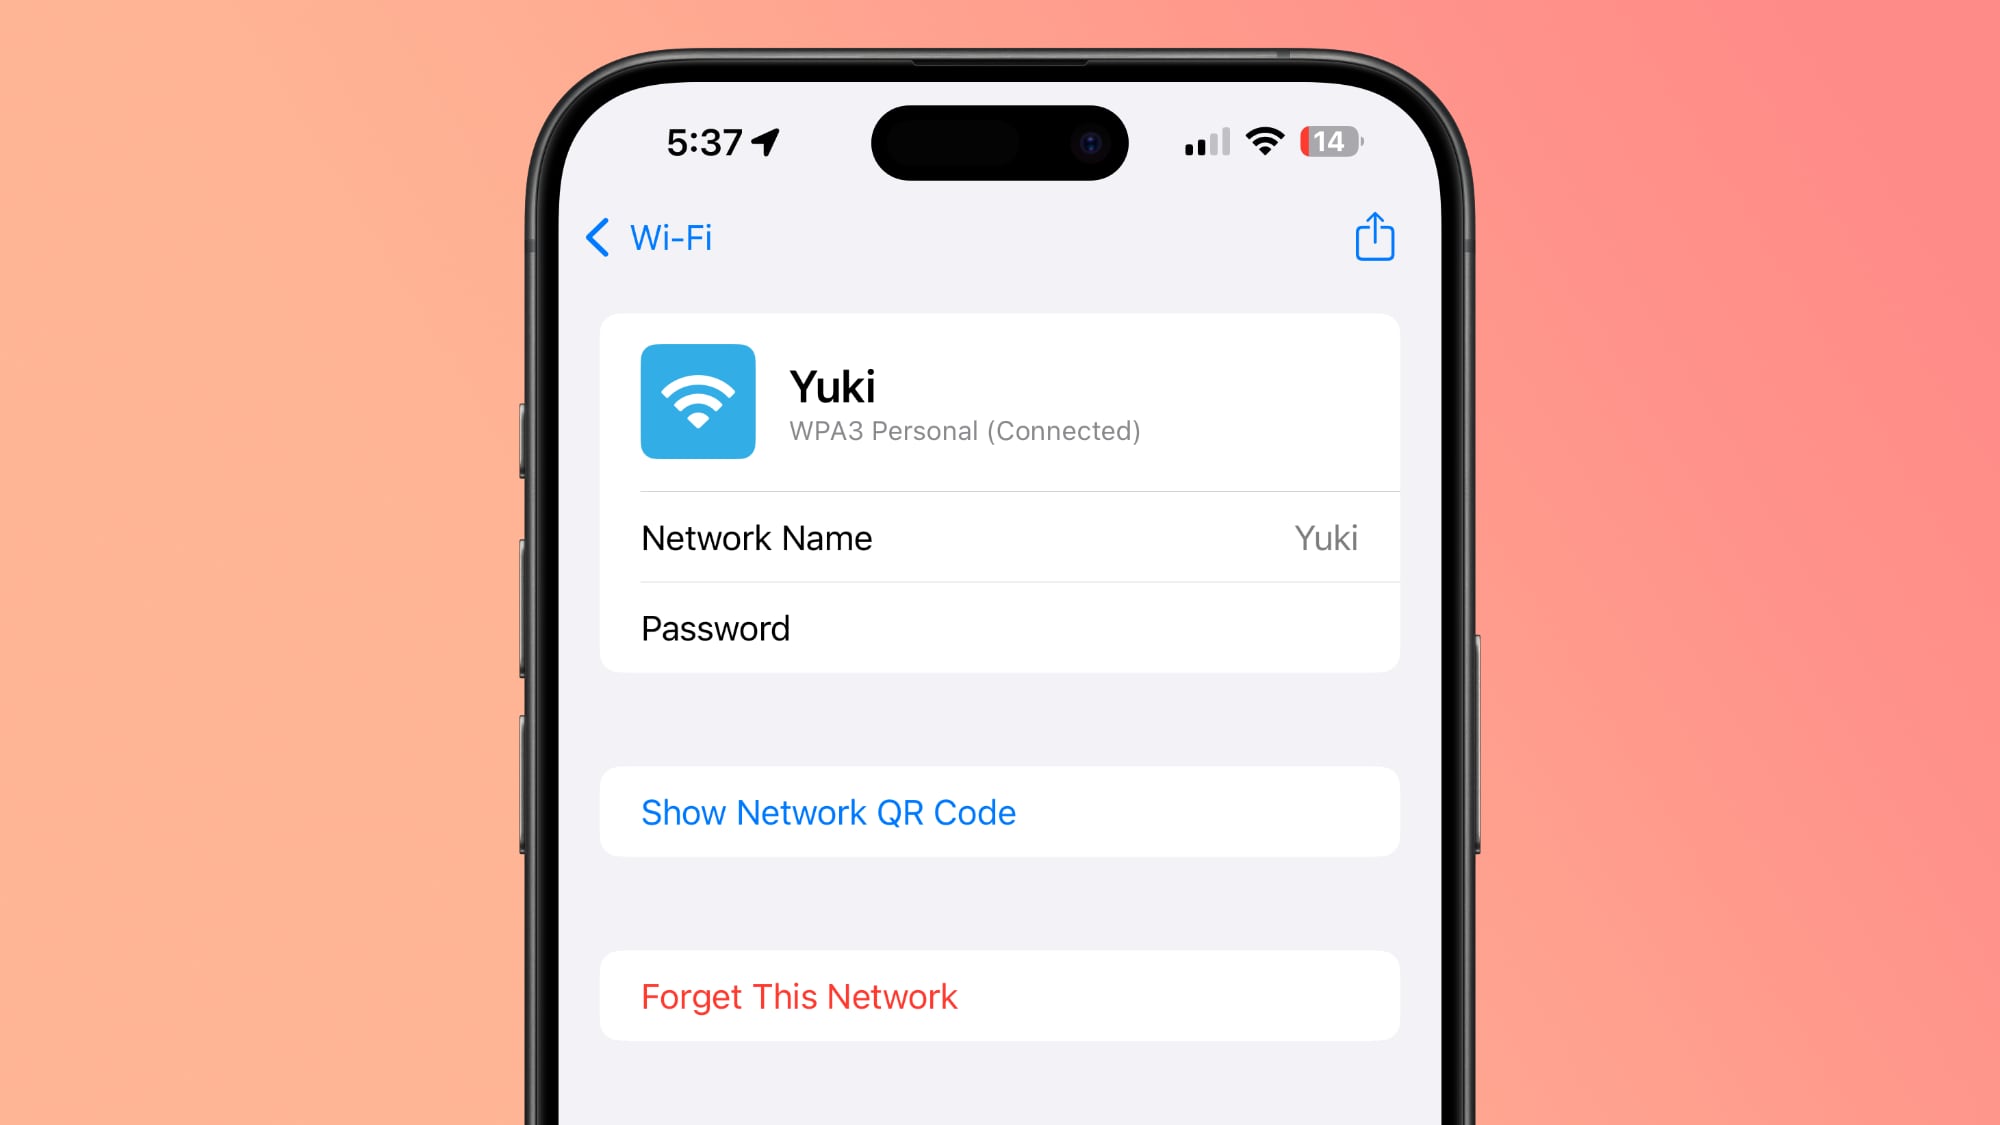
The layout of the Passwords app is similar to what you see in the Passwords section of the Settings app in iOS 18.
Adding Logins and Passwords
To add a login or password to the Passwords app, it’s as simple as tapping on the “+” button at the bottom of the main interface.
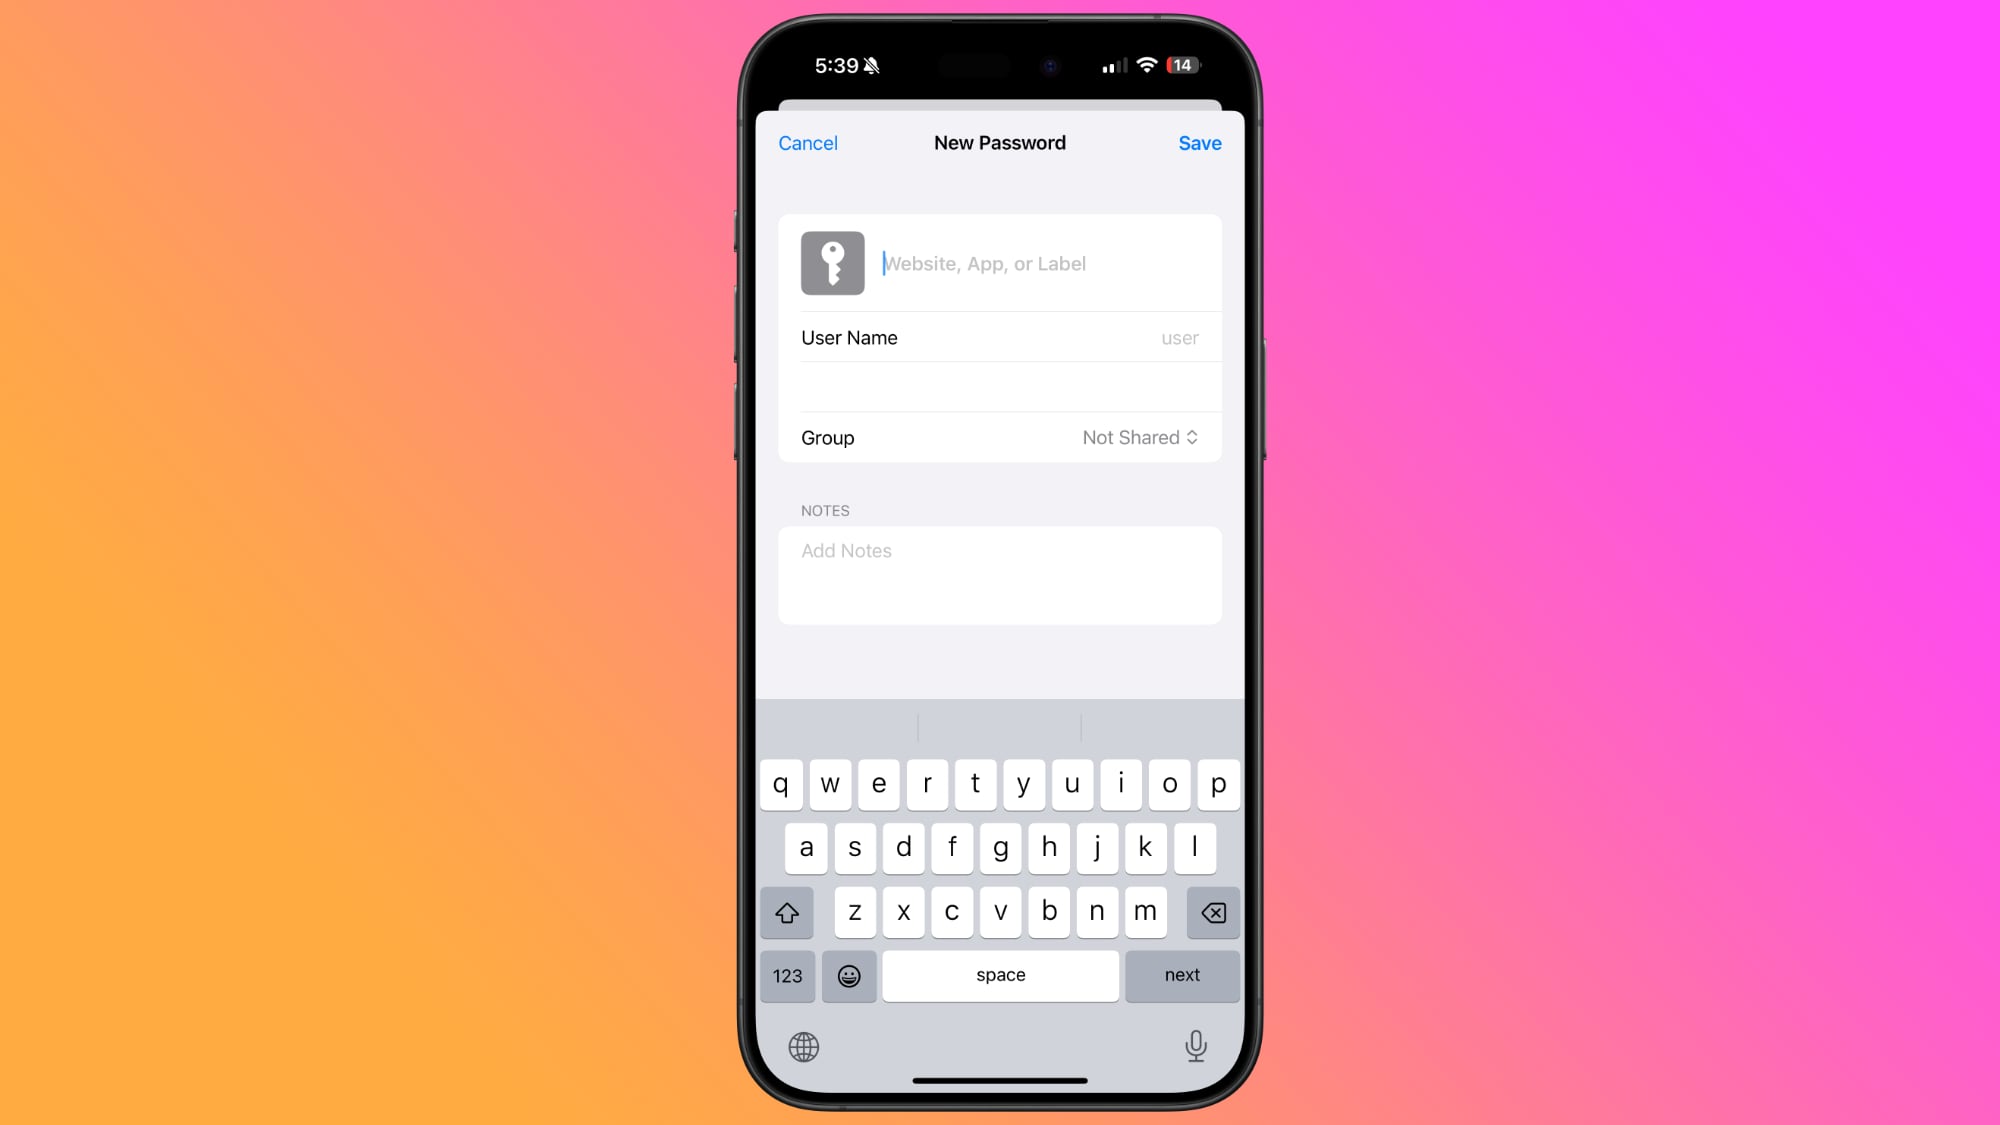
The Passwords app populates a new entry with a password automatically, and you just need to add the website name and username, then copy the password and put it in the app, website, or service you’re signing up for. Tapping on Save will save the information.
If you want to add information to an existing entry, you can tap into the relevant section, such as All, search for the login you want to update, tap it, and then select the “Edit” option to get to the editing interface for adding notes, changing a password, or adding a verification code.
Passwords and logins are added automatically to the Passwords app when you have iCloud Keychain enabled and you create a new login in Safari or in an app.
Changing Passwords
To change a Password, you just need to open up the Passwords app, search for the login you want to update, tap on Edit, and then tap on the “Change Password…” option. You can also browse through Passwords using the “All” section.
Tapping on Change Password opens up the website associated with the login and password, but you will need to initiate the password change process on the site by logging into your account and finding the appropriate option for updating a password.
Deleting Passwords
To delete a password, go to the “All” section and browse until you find it, or search for a specific login. From the “All” overview, you can swipe from right to left to bring up a delete option. Just tap on delete to remove the password.
You can also tap into any of your logins, choose Edit, and select Delete Password from there. To delete multiple logins, tap on the Select tool at the top right of the display (it looks like a list with a checkmark) and then tap any of the logins you want to delete. When you’re done, tap on Delete again to delete them all.
Passwords that you have deleted are stored in a Deleted folder in the Passwords app for 30 days before they’re permanently deleted. You can tap into that folder and swipe to delete logins and passwords right away. Alternatively, you can use the select button at the top to delete multiple logins at one time.
Authentication Codes
The Passwords app can provide two-factor authentication codes for sites that make additional security options available. To add a two-factor authentication code, tap on the “Codes” section of the main Passwords interface.
From there, tap on the “+” button. You can either scan a QR code with a camera, which is a common way two-factor authentication apps work, or enter a setup key. Once the code is stored in the Passwords app, you can open up the Codes section at any time to get a temporary code to log in to a site or app.
Two-factor authentication codes also show up when you search for a password and login or browse through logins in the “All” section.
Passkeys
Websites have started transitioning from passwords to passkeys, and the Passwords app stores your passkeys as well as your logins and passwords.
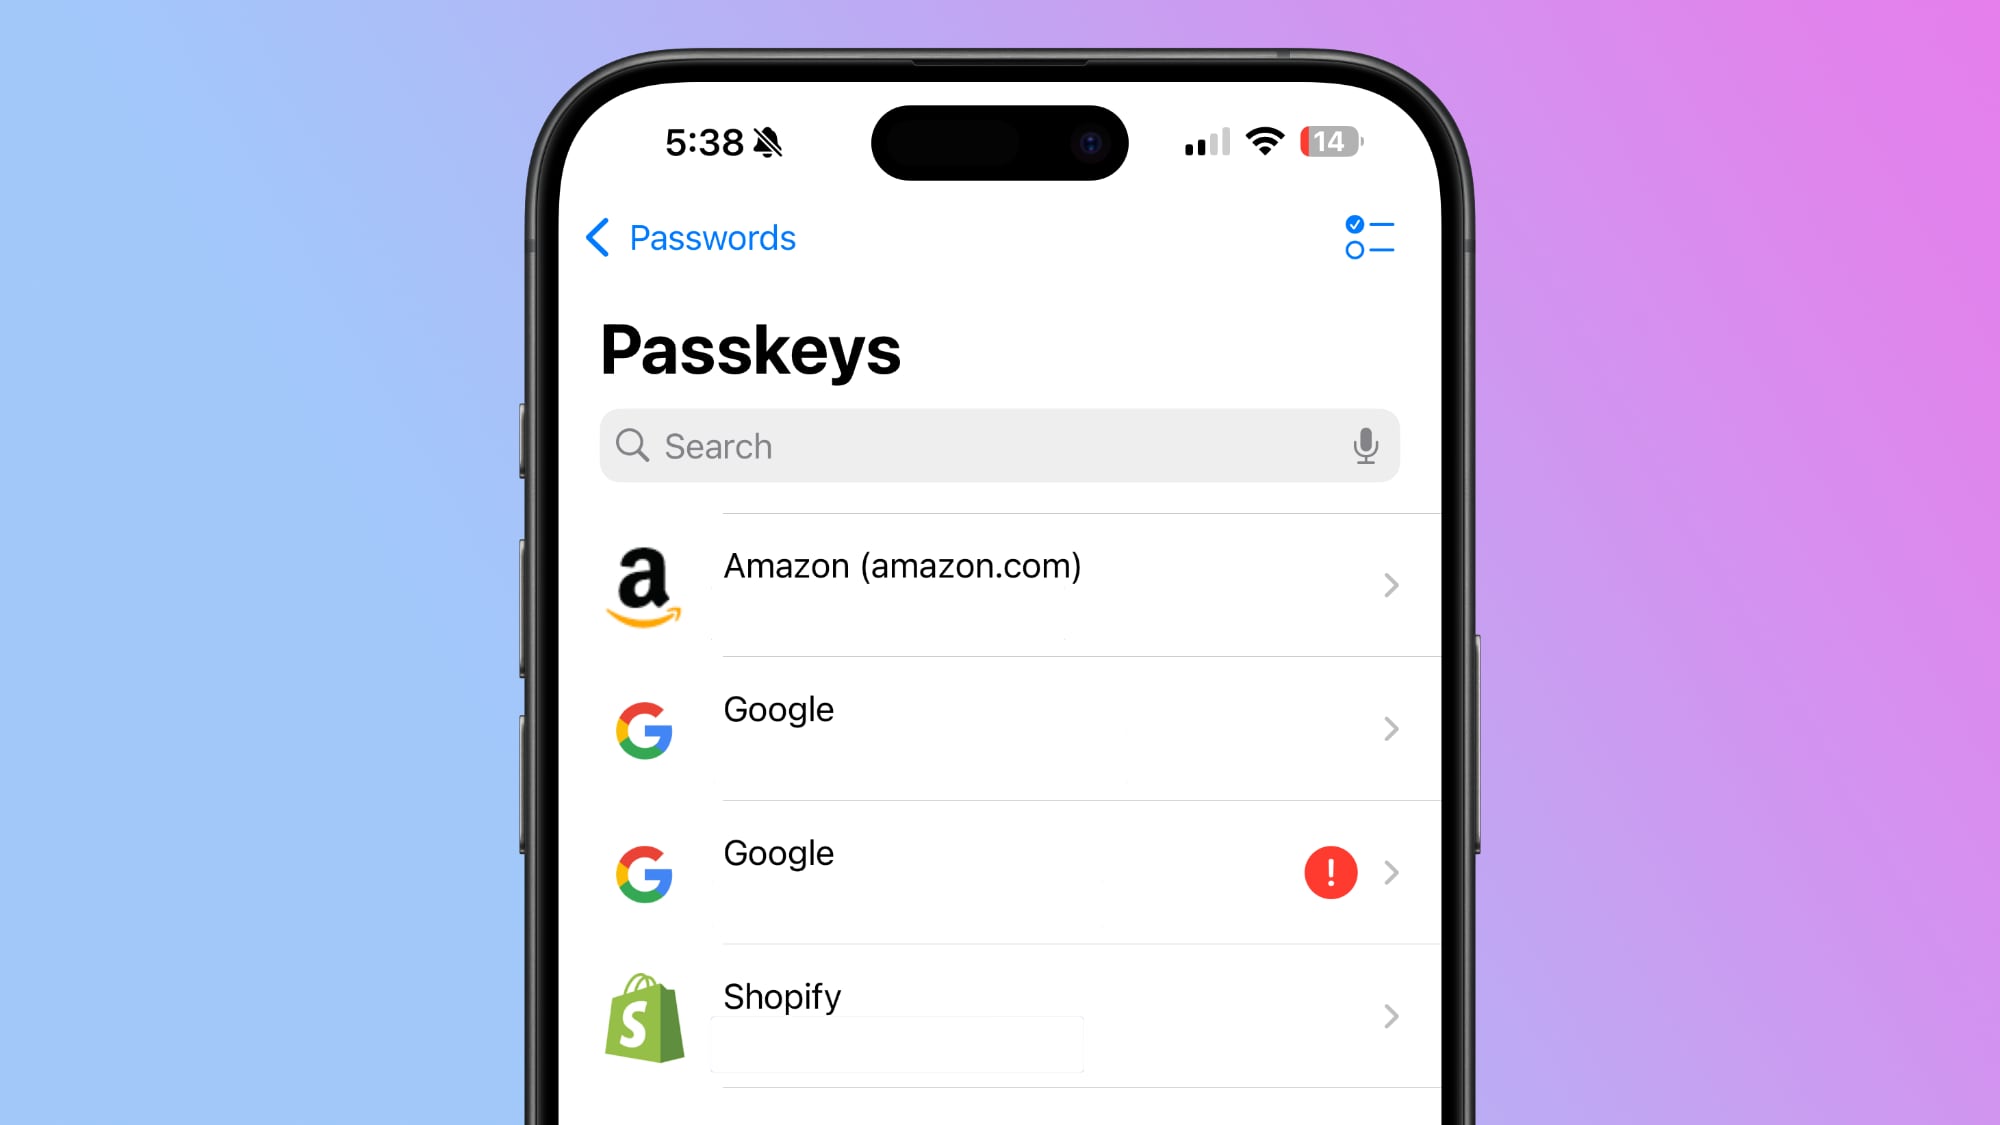
Passkeys are more secure than passwords, and they let you log into your accounts using Face ID or Touch ID authentication on an Apple device. Passkeys basically use a cryptographic key pair, with one public key stored on a server and a private key stored on your device.
Private keys are not shared, they remain on-device only, and can’t be sent to other people, protecting your accounts from phishing attempts.
You can see your stored passkeys in the Passkeys section of the Passwords app.
Password Sharing
The Passwords app lets you set up and share select passwords with trusted contacts. You can create one or more groups of people that include family and friends, providing them with access to shared logins and passwords.
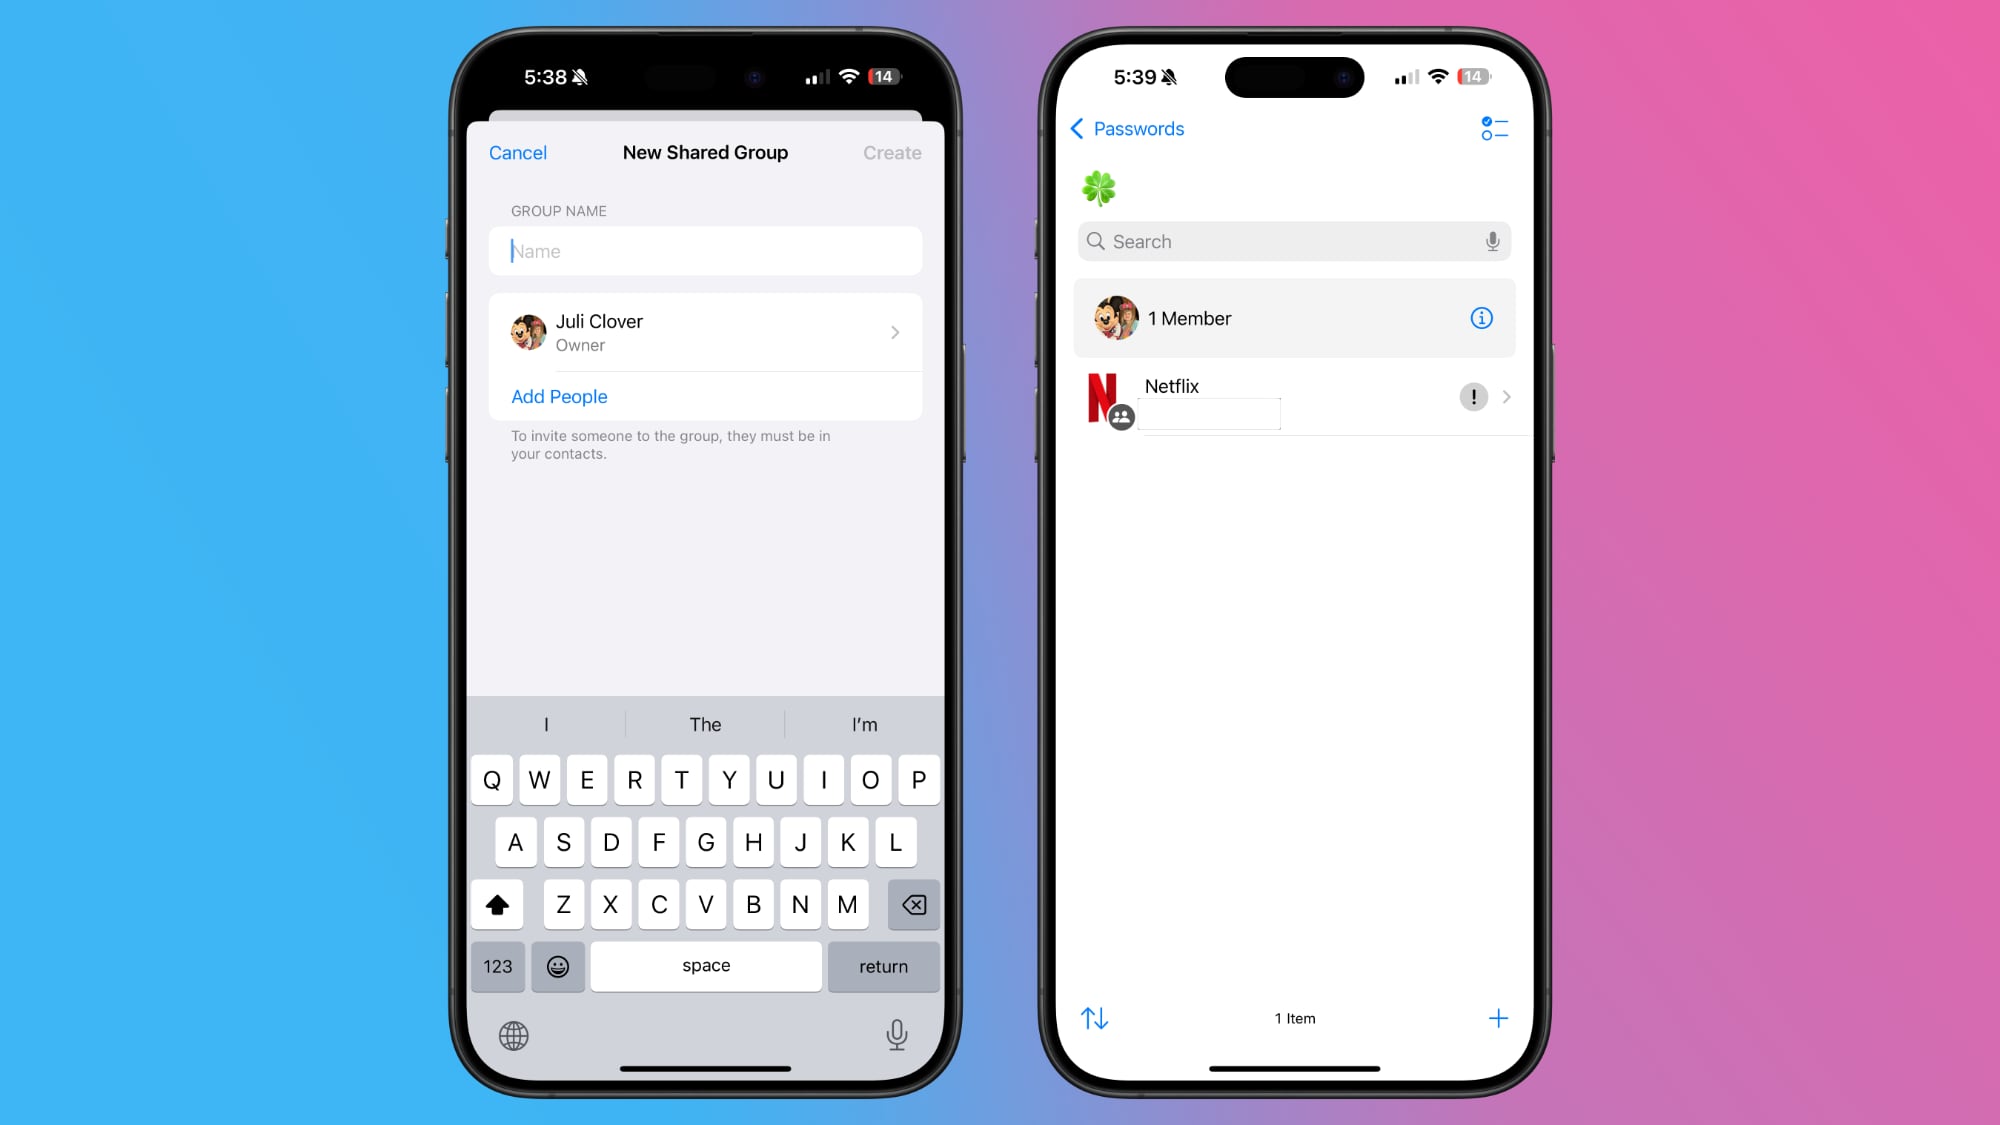
Creating a group can be done by tapping on the folder on the left hand side of the main Passwords interface. Type in a name, and then select people to add. Note that anyone you add needs to be in your contacts list.
From there, you can select logins and passwords that you want to share. Logins and passwords can be removed at any time, and all members of a group can contribute logins. The group creator can remove people from the group at any time.
To share a password with someone in person, you can search for the login that you want to share and then use the Share Sheet to open up an AirDrop interface that will let you AirDrop the login and password information. The Share Sheet is only designed for this kind of in-person sharing.
AutoFill
If you have AutoFill enabled on your devices, your logins and passwords will be entered automatically when you visit a website in Safari that you have stored login information for. AutoFill will pop up an option for the appropriate login and password on any account login field in Safari or in an app.
AutoFill works the same as it did when passwords were limited to the Settings app.
Sorting
In the “All” section of the Passwords app, you can tap on the icon that features two arrows to get to sorting options.
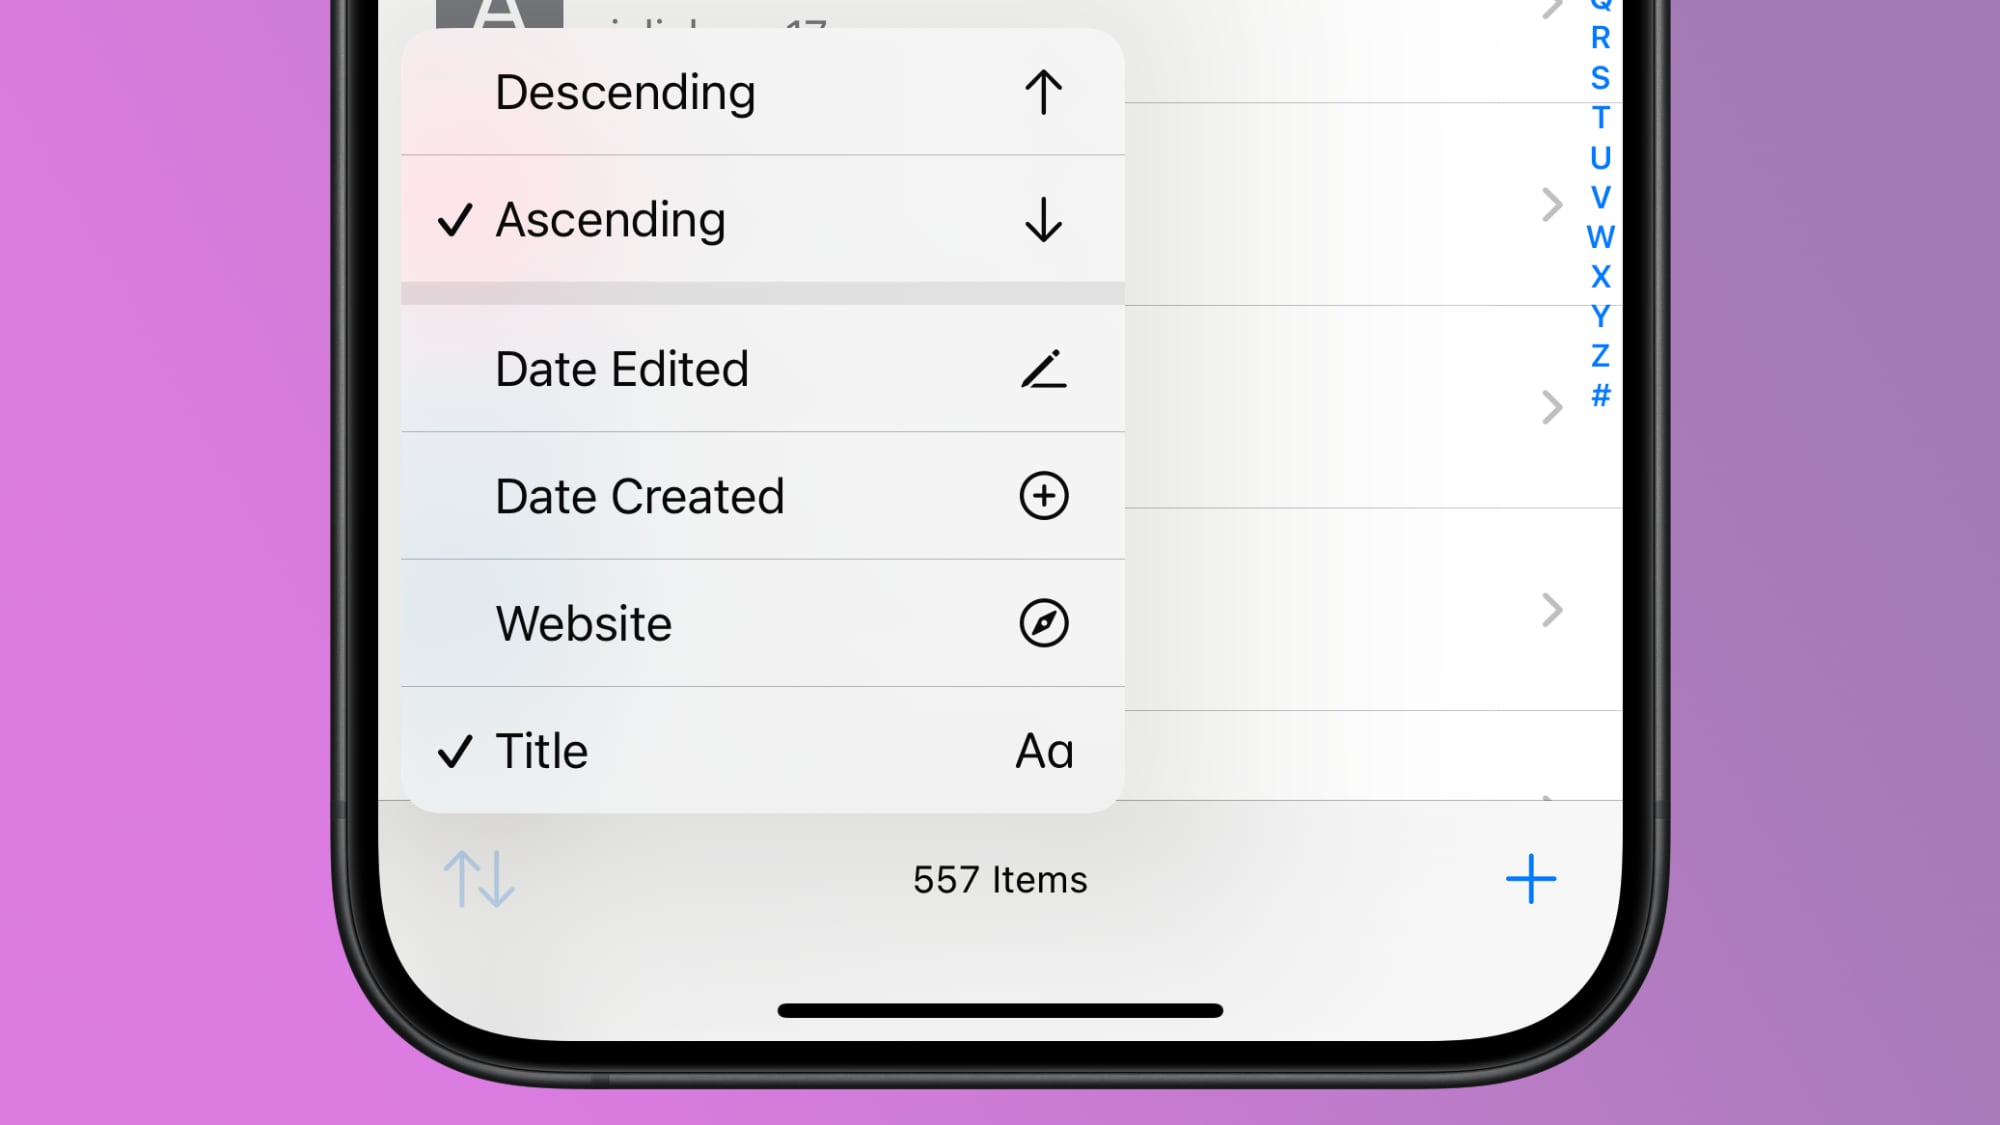
Sorting options include Date Edited, Date Created, Website, or Title, and each of these can be displayed in a Descending or Ascending list by tapping on the desired option.
Syncing
Passwords are synced automatically between all of your Apple devices using iCloud Keychain. You just need to have the option turned on and you need to be logged in to your Apple ID on any device where you want to access your passwords.
You can even get to your logins and passwords on a Windows PC because Apple is adding the Passwords app to iTunes for Windows.
Security
There is a dedicated Security section in the Passwords app, and it lets you know if you have a password that is reused, too weak, or has been compromised in a data leak.
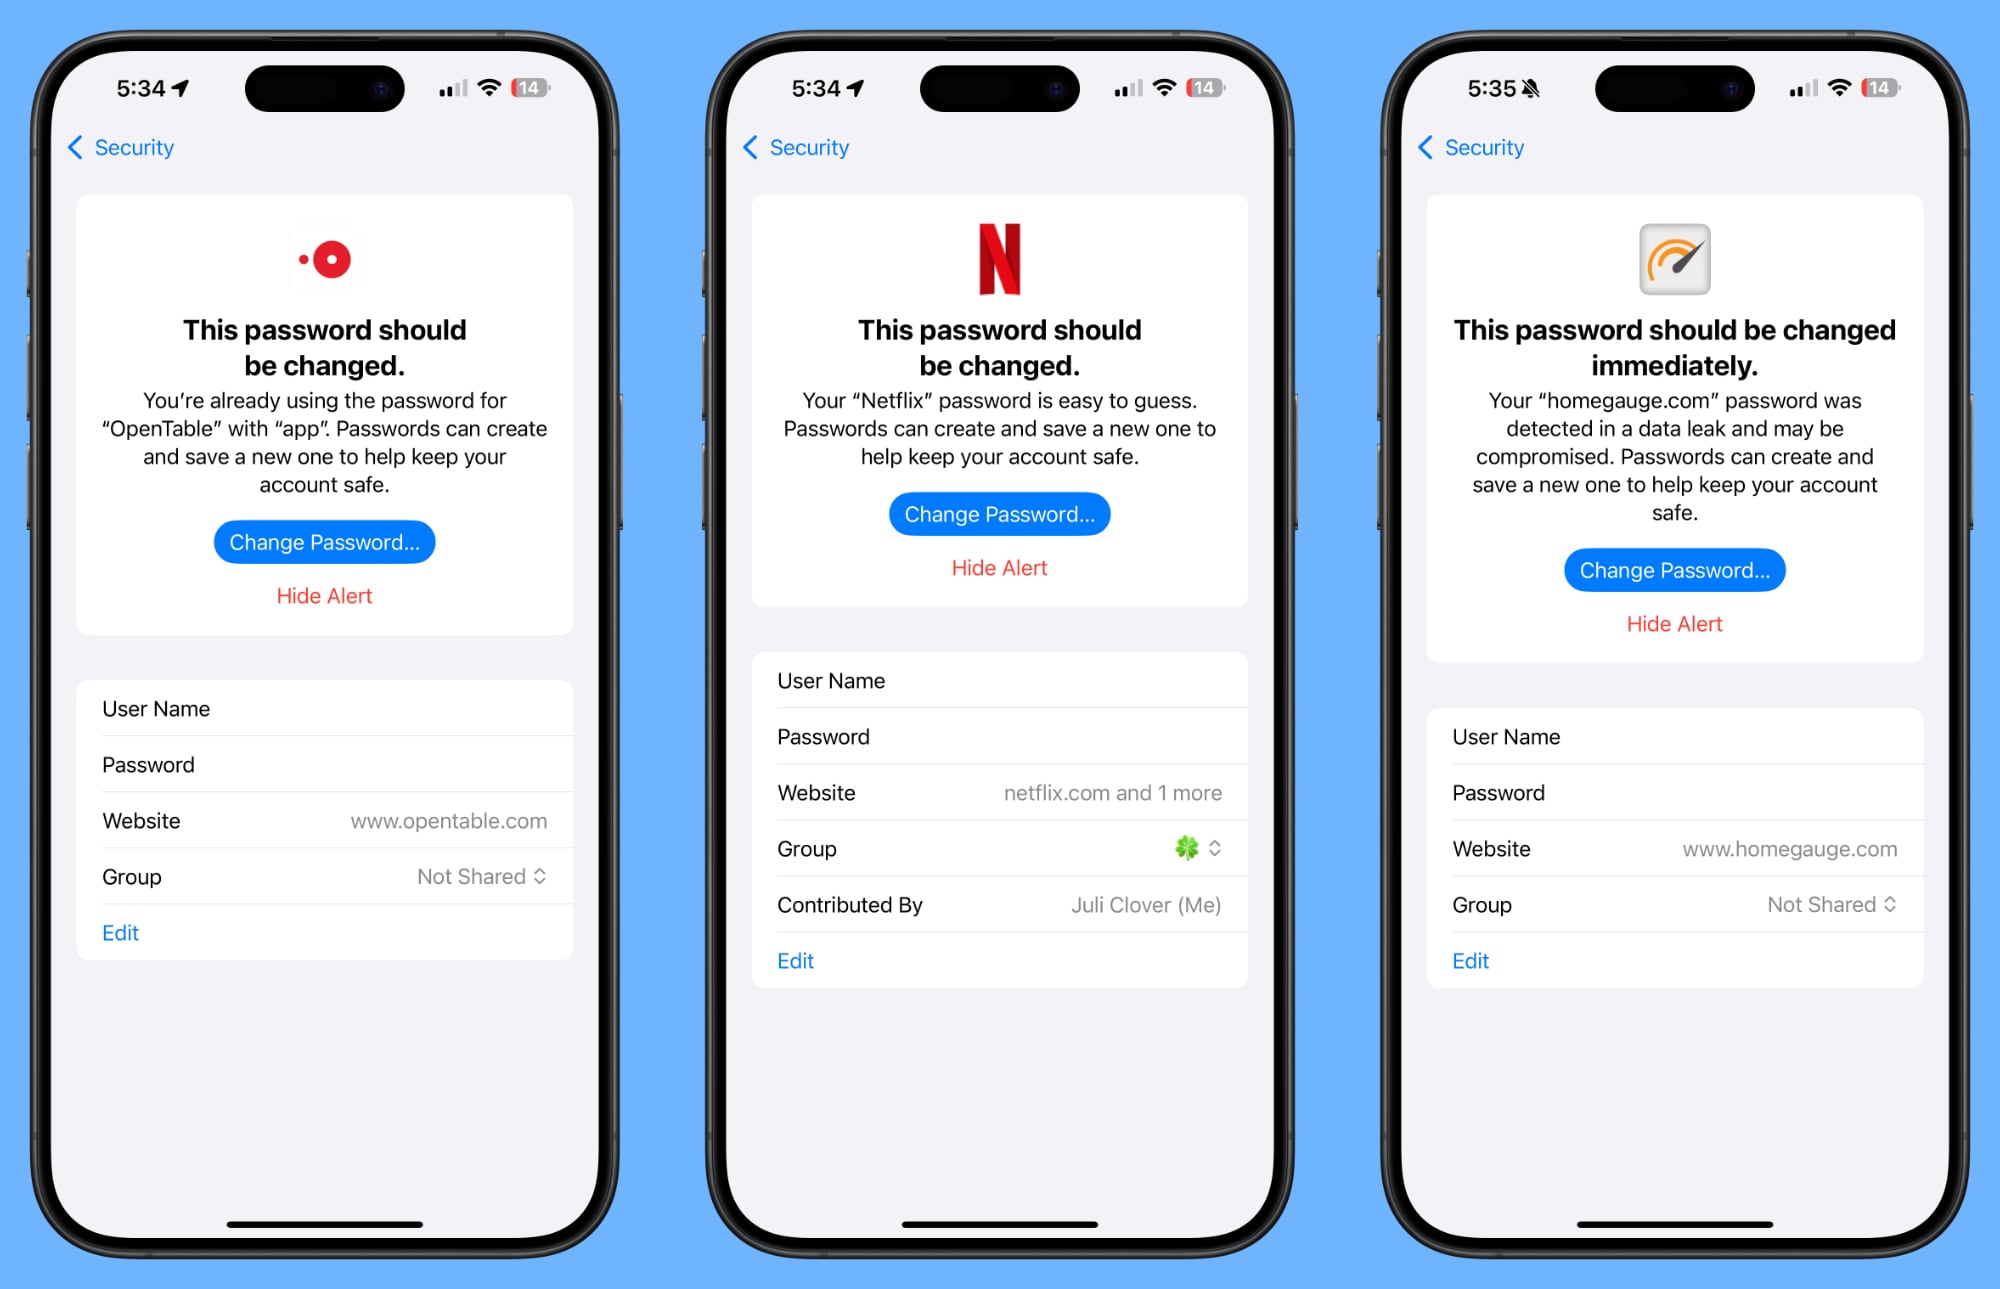
Warnings are accompanied by information letting you know that a password change is in order, and you can tap on the Change Password option to go to the website where you need to update your information.
For any individual login, you’ll also see information letting you know if your password is weak or strong.
Importing Passwords
Apple plans to provide a tool for importing passwords from other services like 1Password and LastPass, but as of now, this functionality has not yet been implemented.
Read More
For more on the new features that Apple is adding in iOS 18, we have a dedicated iOS 18 roundup.
This article, “iOS 18 Passwords App: All the Features” first appeared on MacRumors.com
Discuss this article in our forums